SOS SmartPay
SOS SmartPay is our online payment portal for processing credit, debit and ACH payments. You can pay single invoices without logging in, or create a login to manage payments, see payment history, set up Auto-Pay and more.
To get started, visit https://payments.ceojuice.com/sosfla
Account Setup and Paying Invoices
How to Create a Login
Go to https://payments.ceojuice.com/Identity/Account/Register?referer=sosfla

Enter your email address, ensuring you use the email address that you currently receive invoices to. If you are unsure of or need to change the email address that invoices are sent to, please email accounting@sosfla.com to request this change, or call us.
Create a secure password and then select Register.

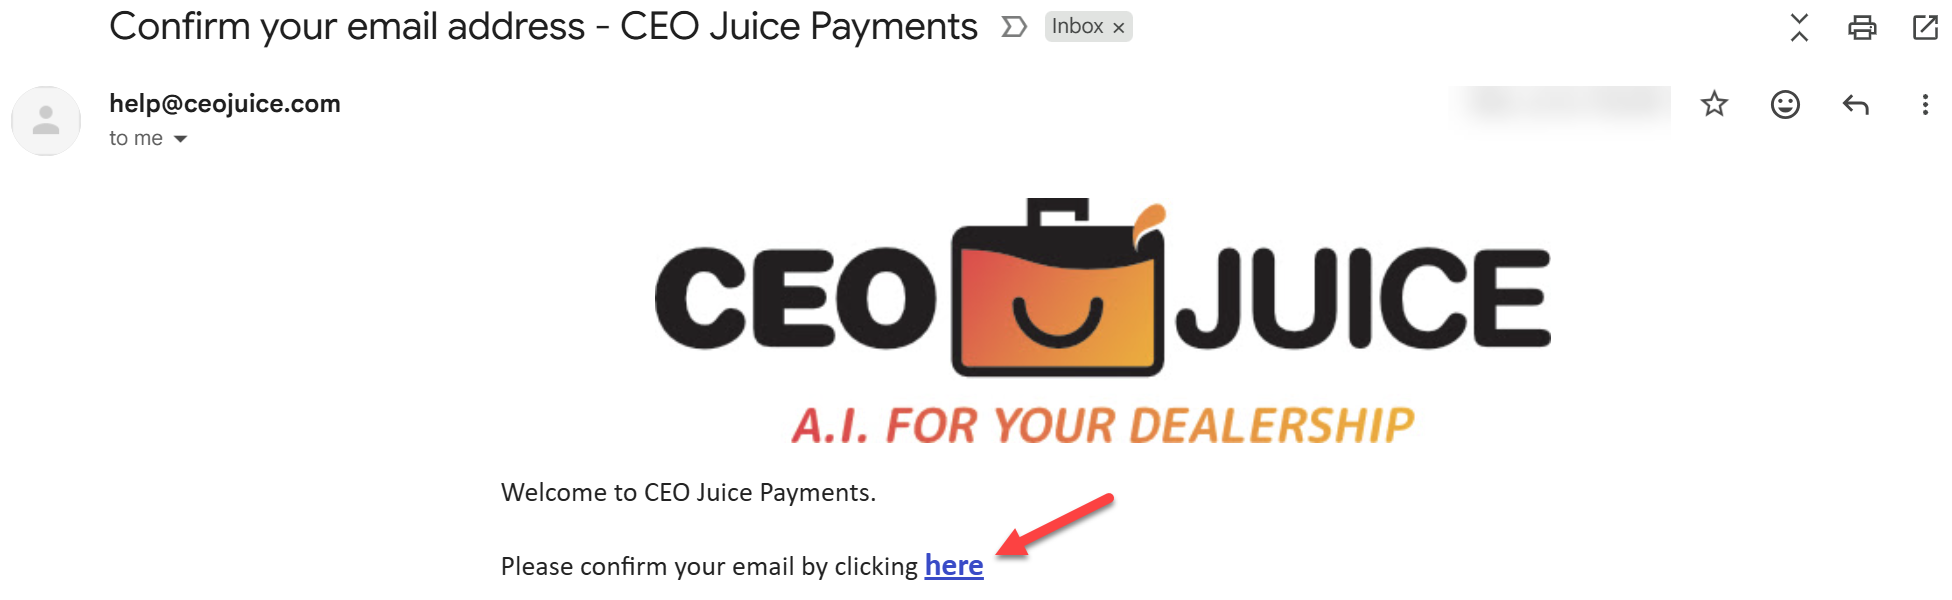
A validation email will be sent from alerts@ceojuice.com (not an sosfla.com email), to the email address you registered with. Click on the link in the email to confirm.
NOTE: The email will come from help@ceojuice.com (not an sosfla.com address). Please check your junk/spam/quarantine folders if not received within a few minutes.
*If you didn’t receive your verification email you can choose Resend email confirmation. After you have registered, if you have forgotten your password you can choose Forgot your password.

You can now login using those credentials at https://payments.ceojuice.com/sosfla
Note that the payment site requires a user's password to be changed every 12 months. Additionally, the site will automatically log the user out after one hour of idle time.
How to View Invoices
Once logged in your default homepage will be the below, where you can view a single invoice under invoice search, see all open invoices, save payment details and manage your user profile.
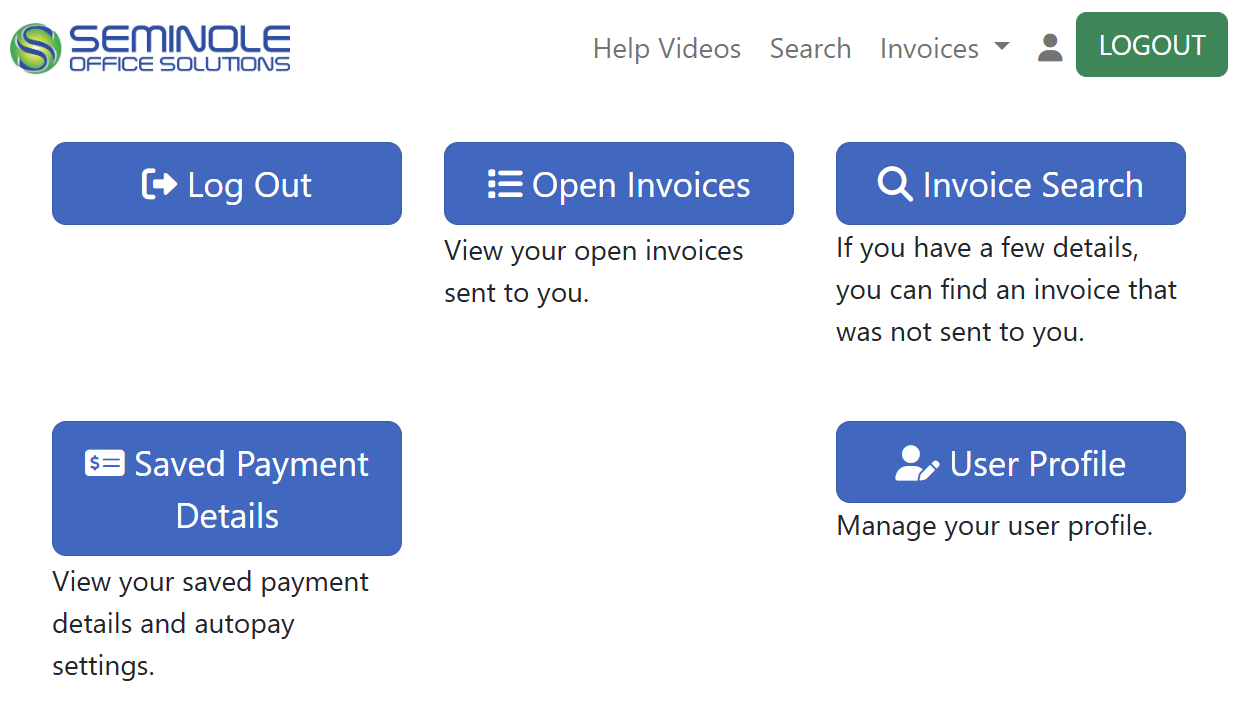
Invoice Search, opens a search page to view single invoices by entering the invoice number, invoice due date and postal code (you do not have to be logged in to view this page).

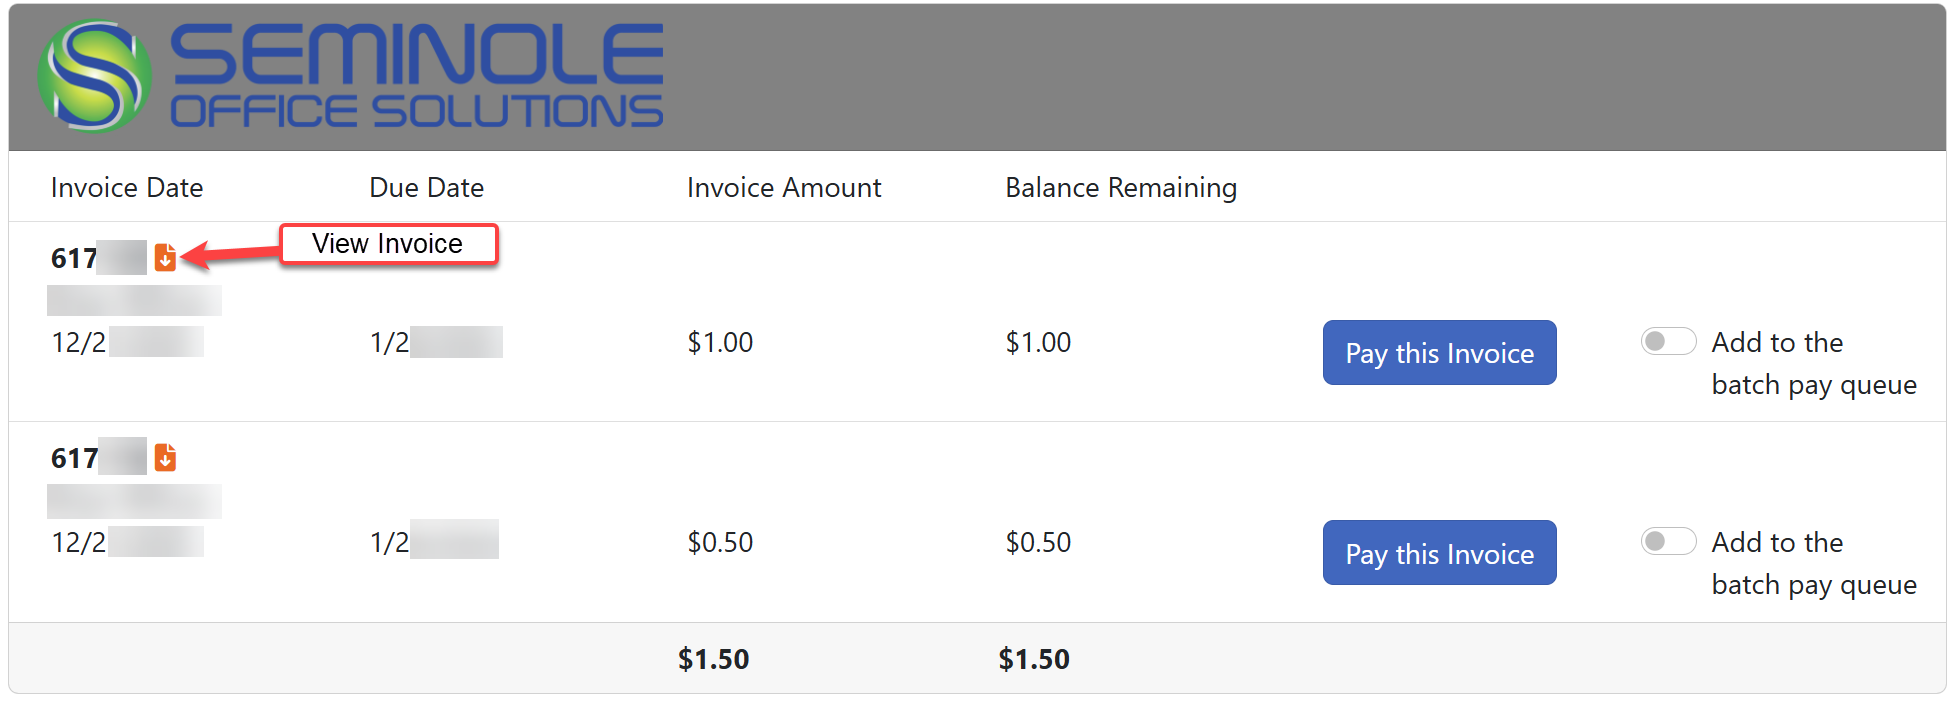
Open Invoices, allows you to see all open invoices. Click on the orange download icon to view a PDF of the invoice.
List of multiple invoices:
If you get a messages saying Don’t see the invoice you're looking for? It’s possible there are no open invoices or you have registered with an email address that is not originally associated with that invoice.

How to Pay Invoices
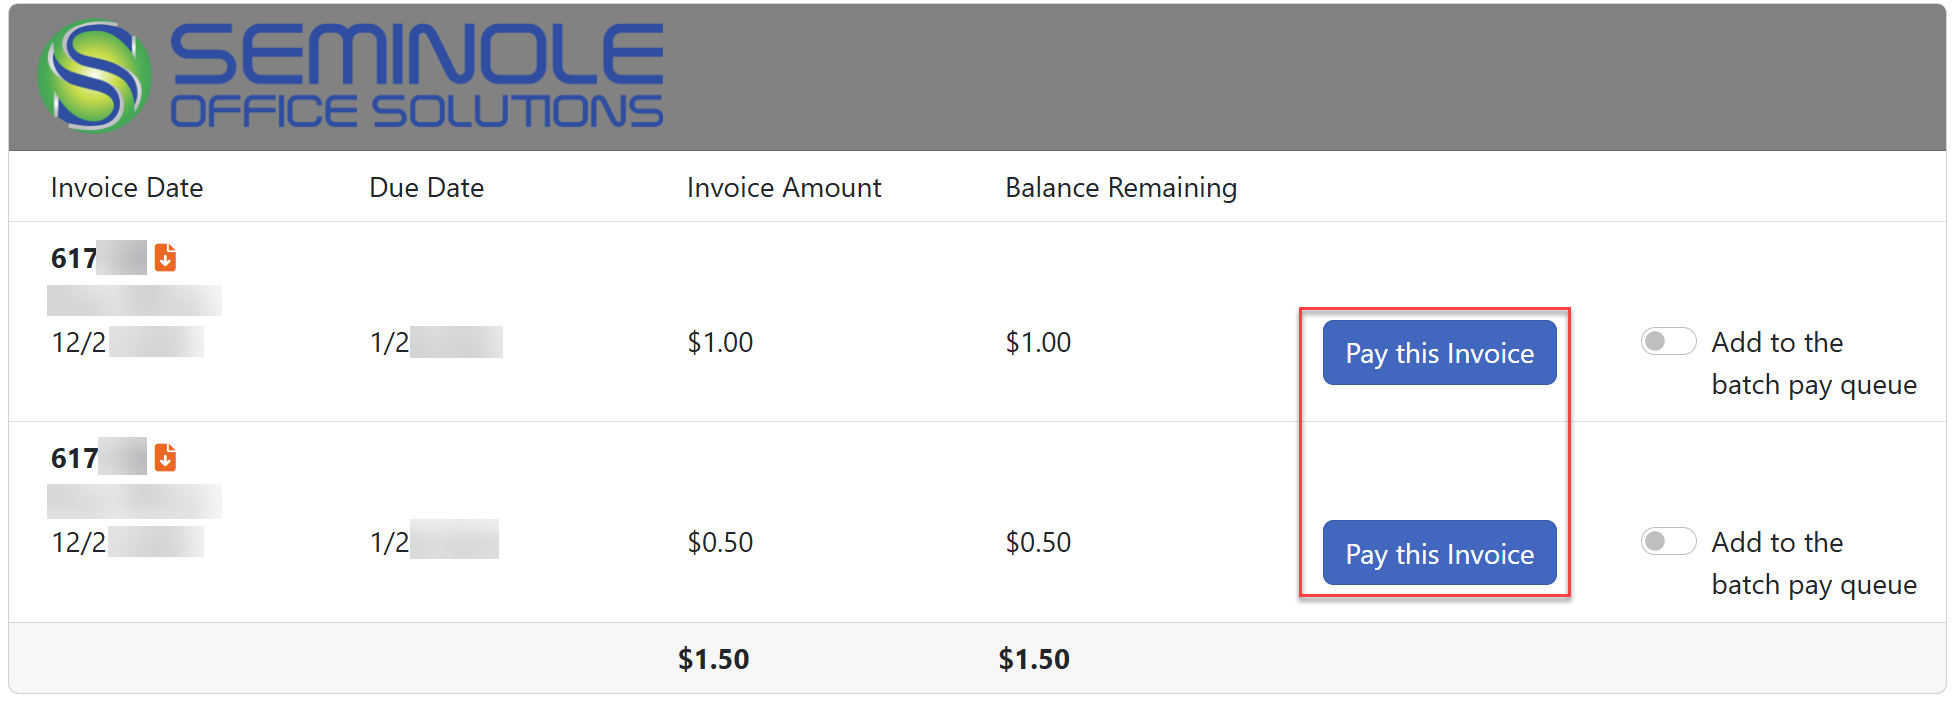
Under Open Invoices, click on the Pay this Invoice button to pay a single invoice.
Displays the invoice details, download icon to obtain copy of invoice, and your two payment options.
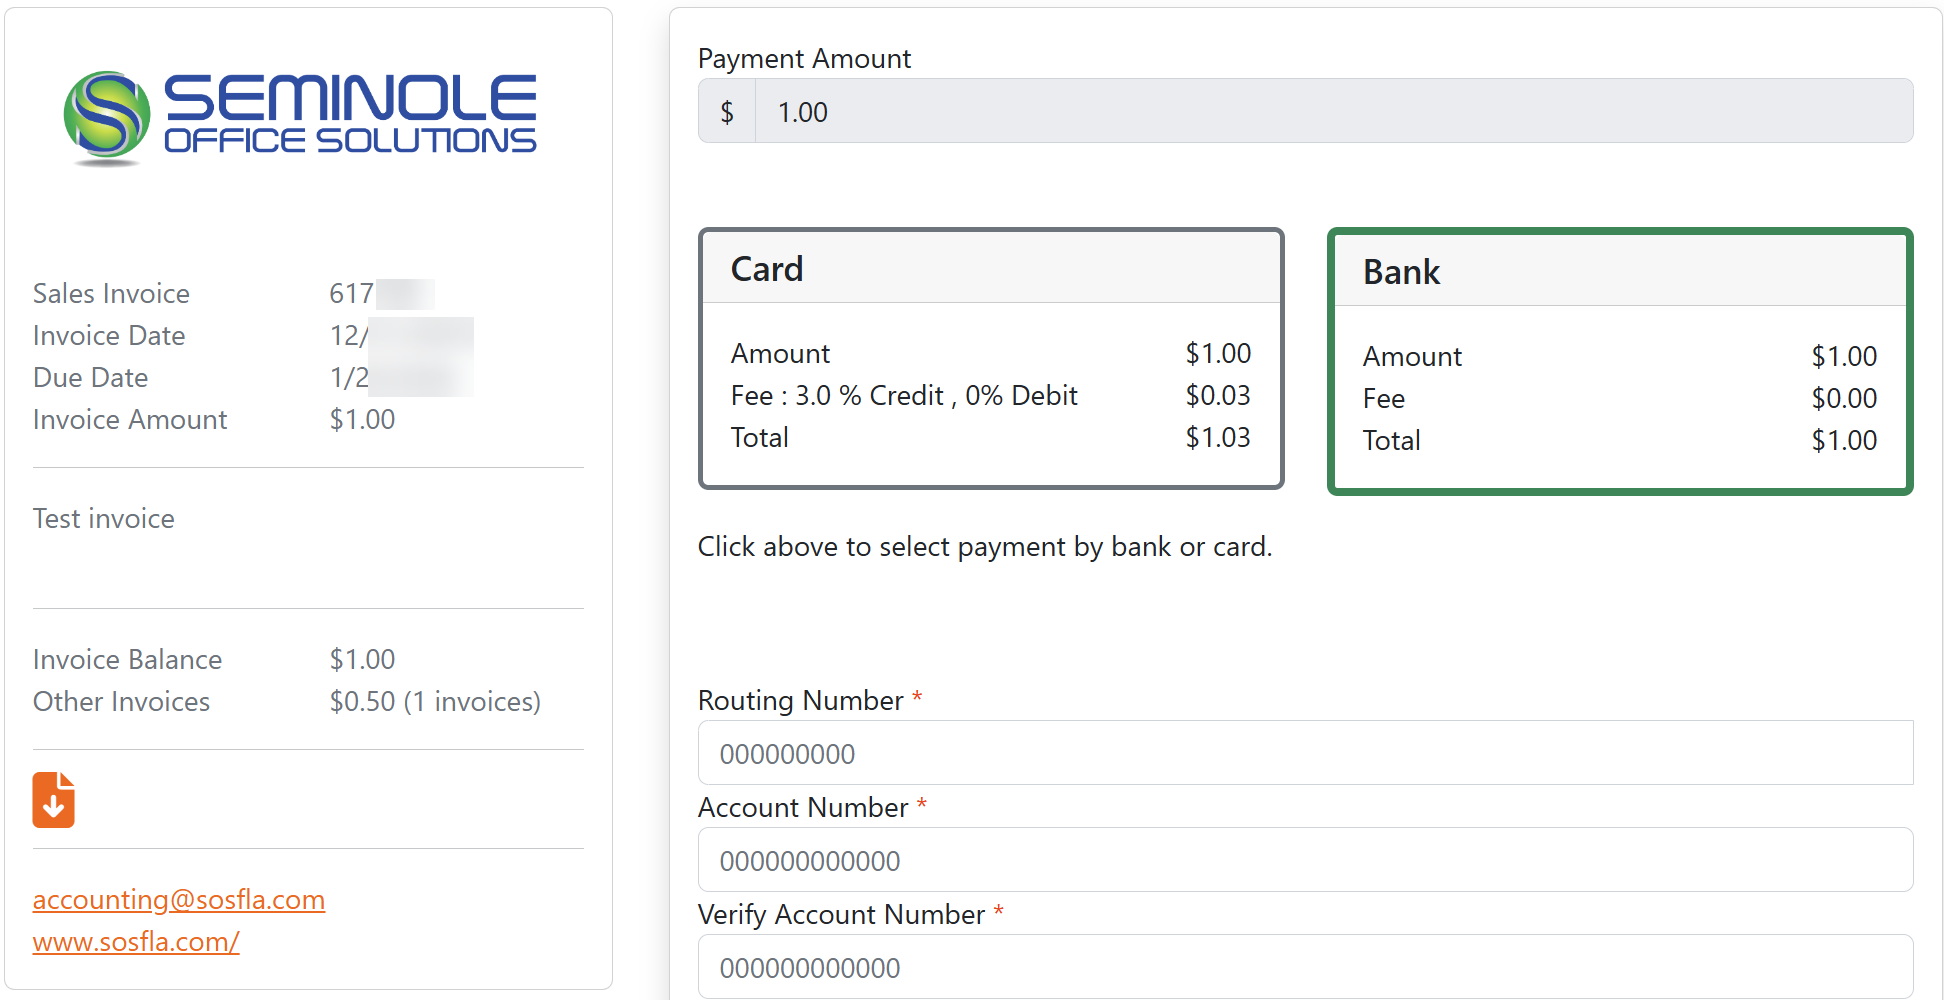
Select your payment option, ACH or Credit Card, enter payment details, click Pay at the bottom to process payment. Note that you cannot overpay invoices, but you can short pay them.
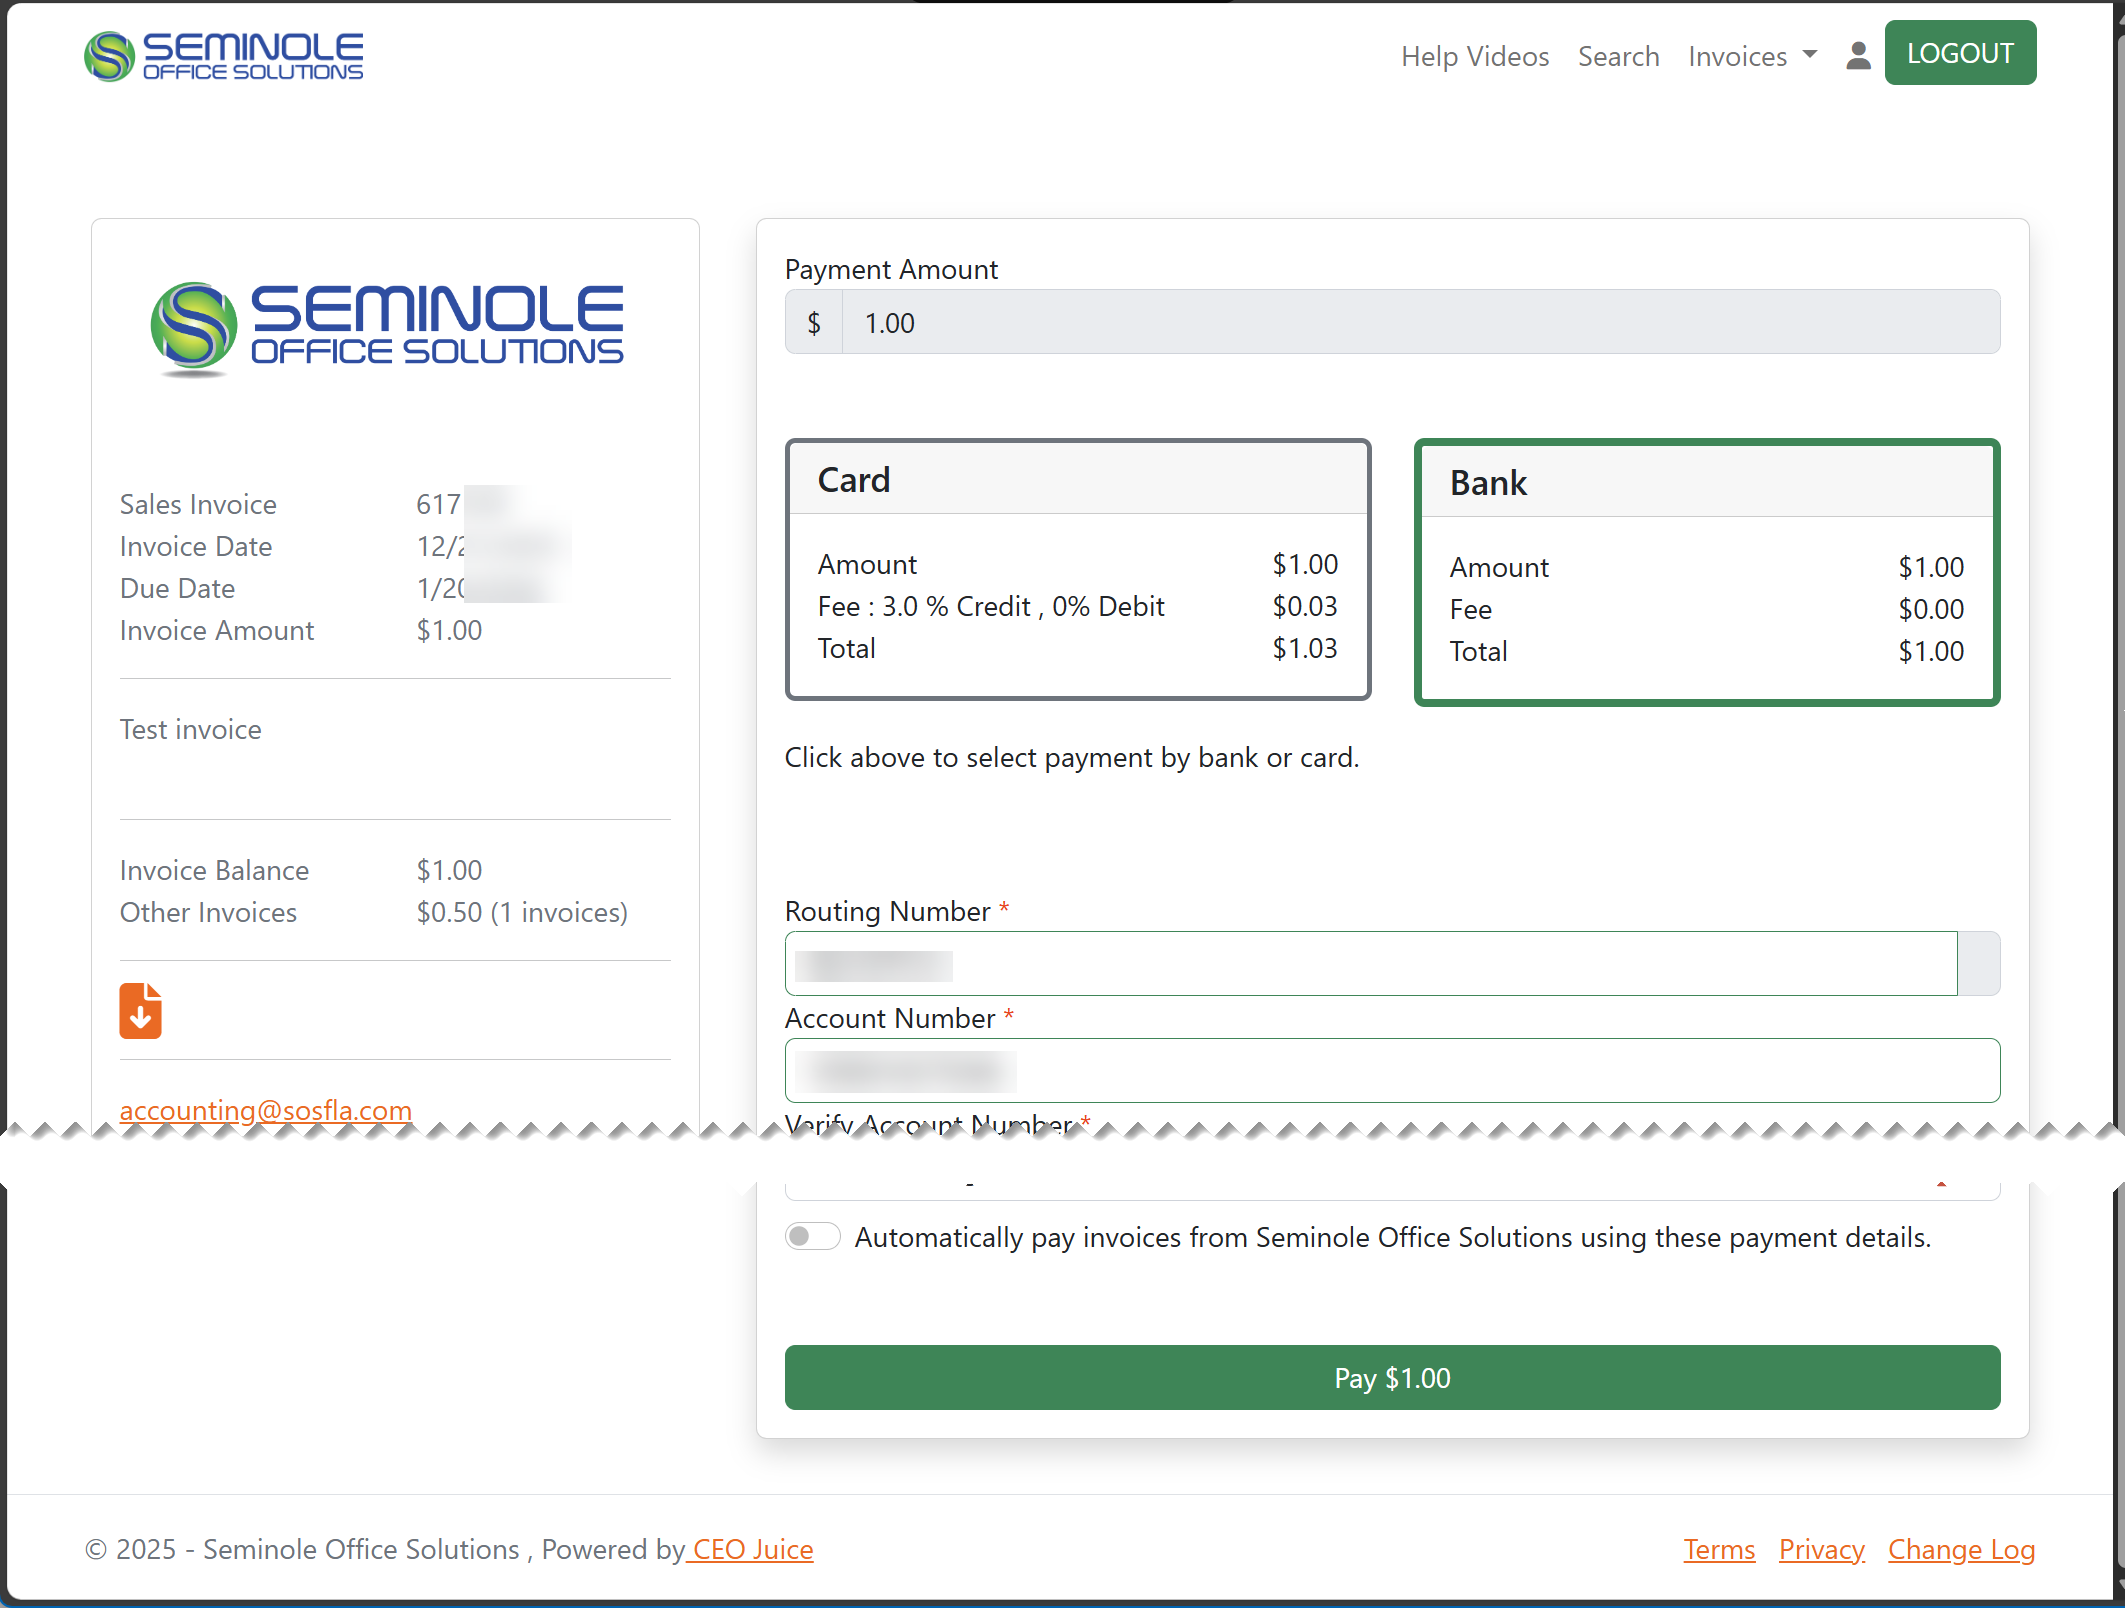
A payment confirmation number will pop up, and you will also be emailed a payment confirmation.

Paying multiple invoices with one payment
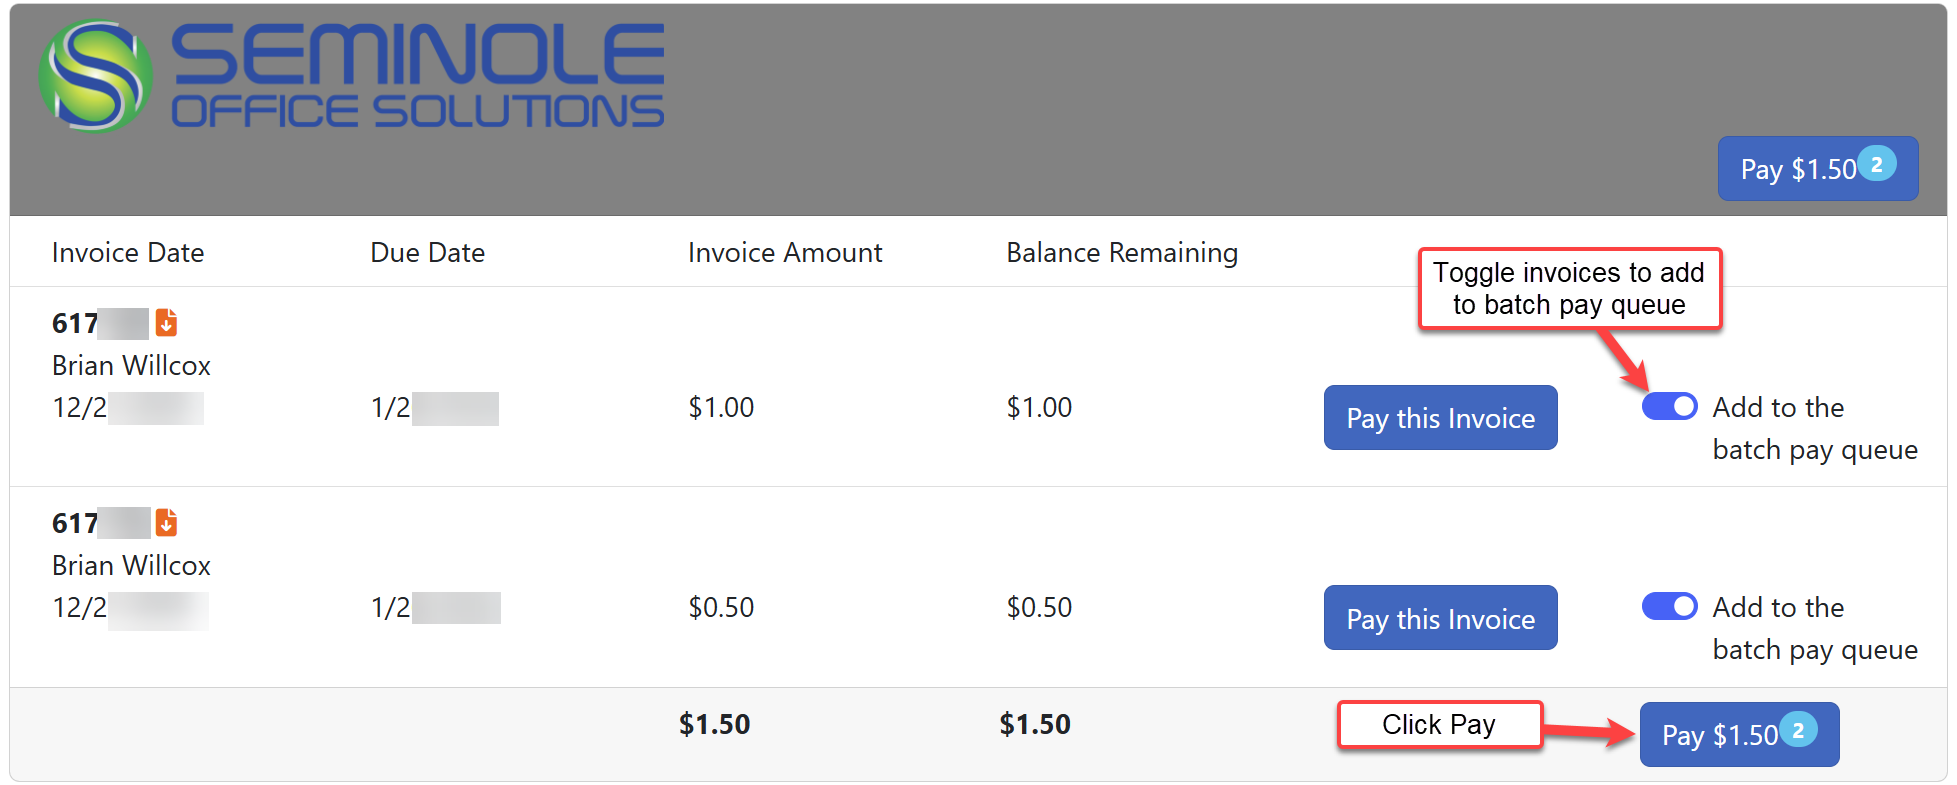
On the Invoice drop down tab choose Open Invoices. To pay more than one invoice at the same time toggle Add to the batch pay queue for each invoice you want to pay, then click on the Pay button.
Confirm the payment amount and invoices listed on the left side are correct. Fill out the payment information.
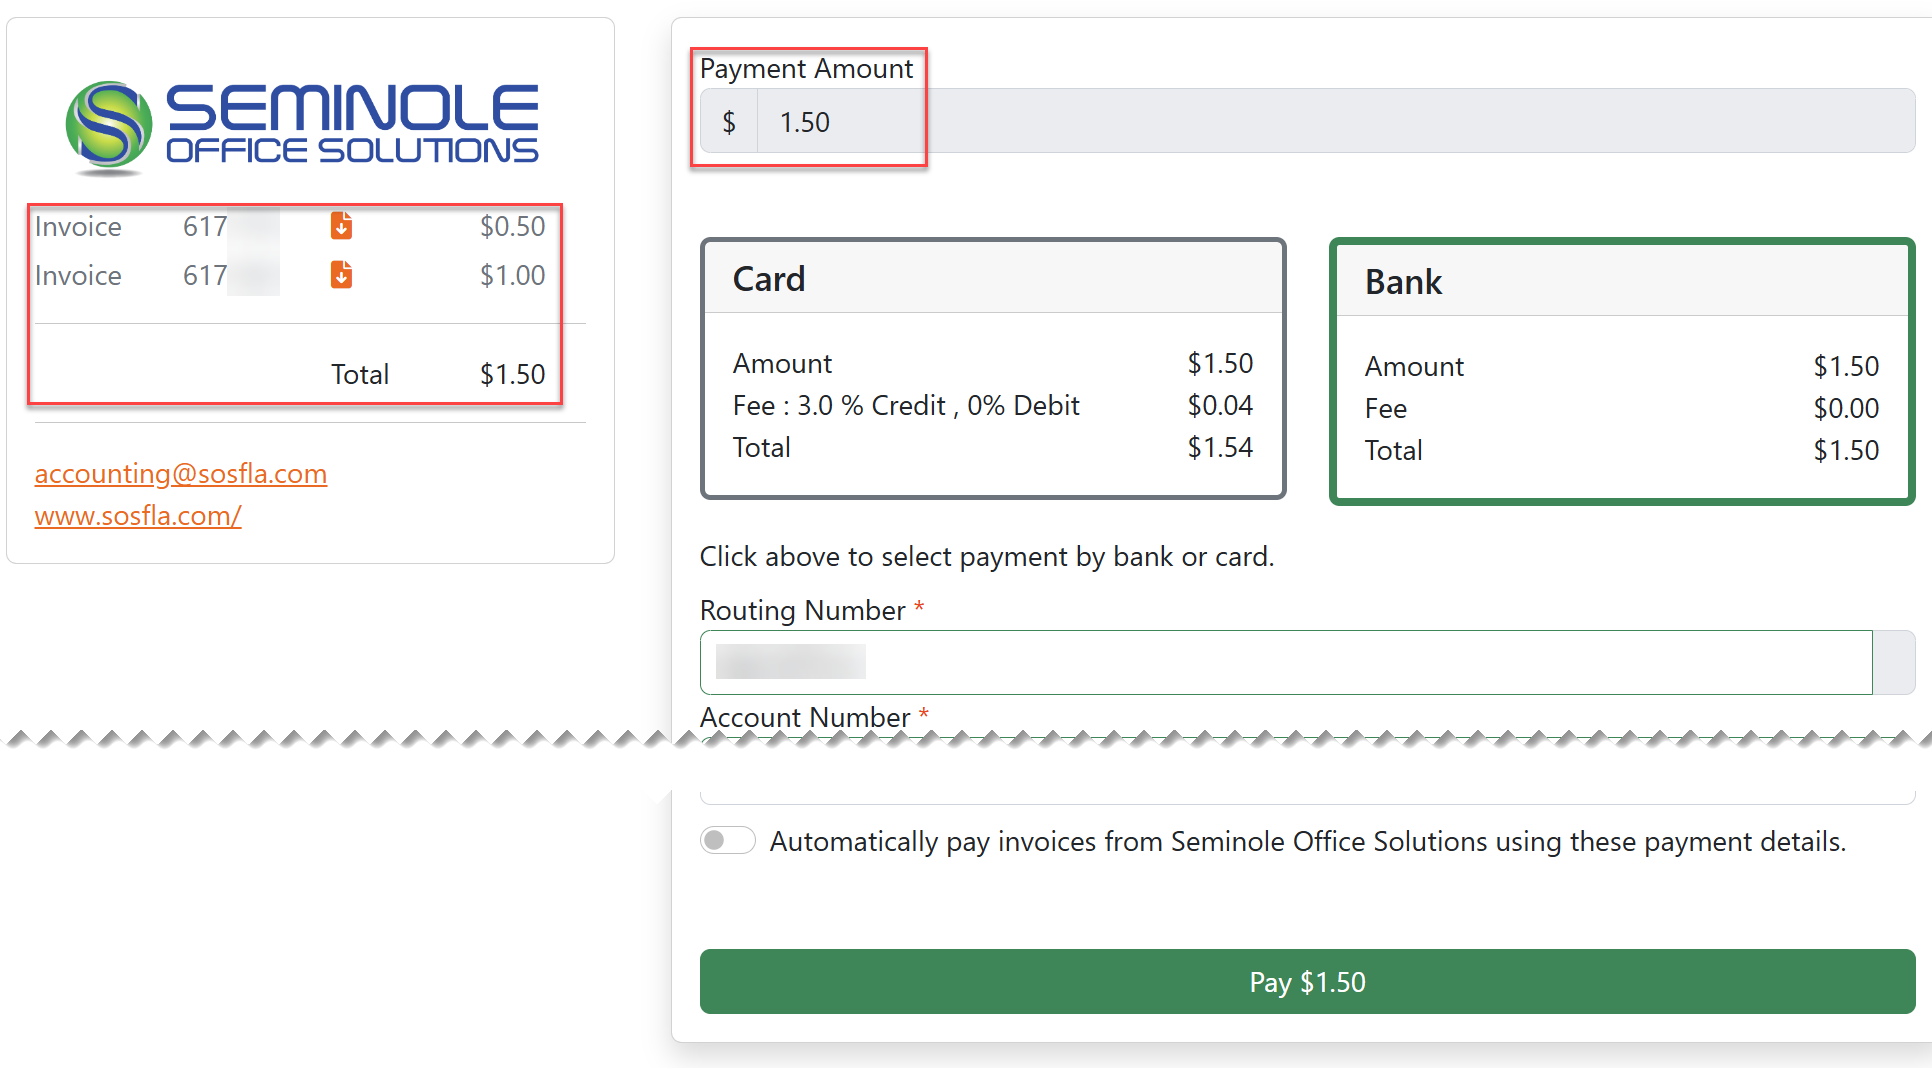
Note that you cannot short pay the total of the invoices when batch paying, you must pay the entire amount. This is because the system does not know which invoice you intend to short pay so it cannot be done.
How to Setup a New Auto-Pay
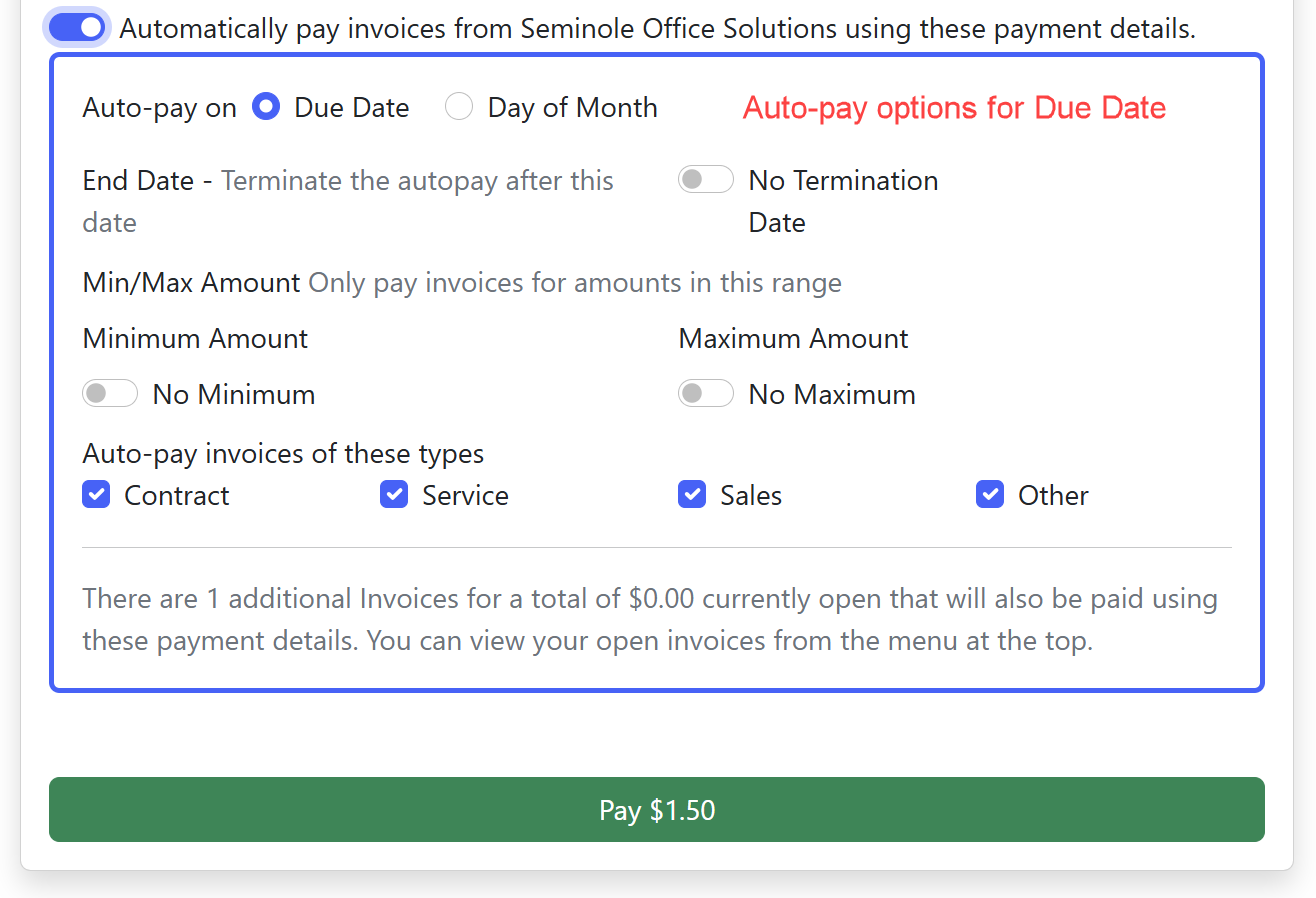
To set up auto-pay, click Automatically pay invoices at the bottom of the screen. Select whether to Auto-pay on the Due Date or Day of Month along with the related options as shown.

Note: If there are no open invoices and you want to setup or adjust your auto-pay settings, you can go directly to Save Payment Details from the landing page.
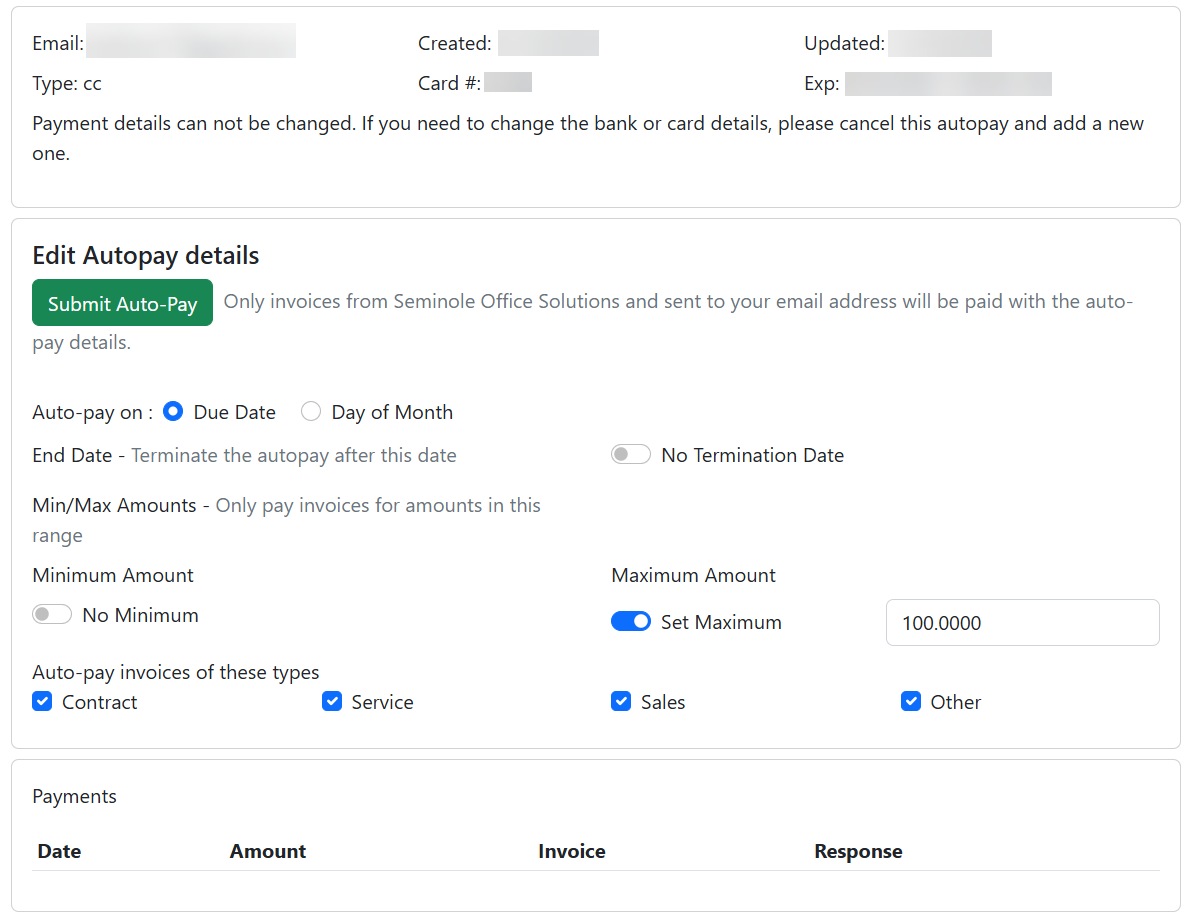
How to Change an Existing Auto-Pay
You can change and view details of your existing auto payments by following the steps below.
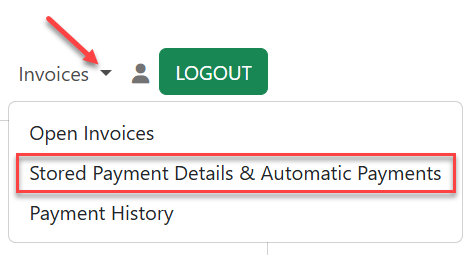
At the top of the portal screen select Stored Payment Details & Automatic Payments from the drop-down menu.
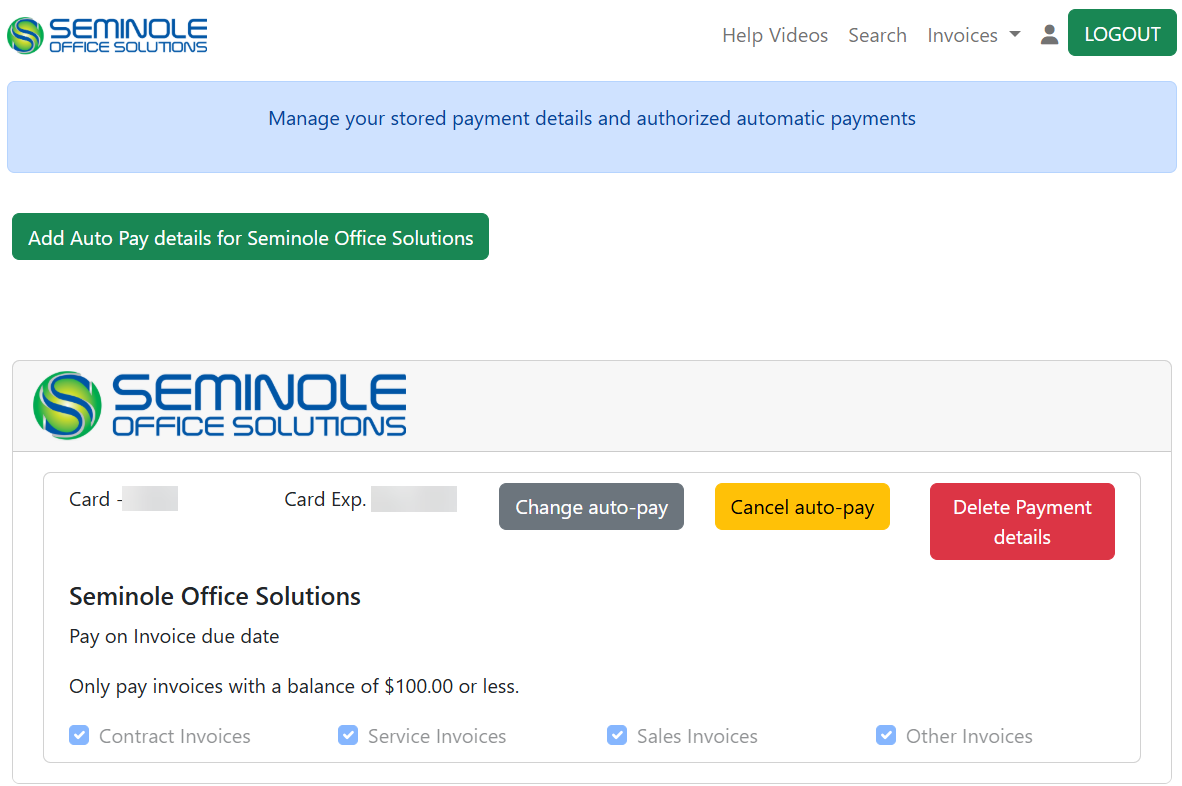
This screen will show the auto payments that you have set up.
Click Change auto-pay to change details on the auto pay such as scheduled run date, invoice minimum and maximums, etc. You can also see the payments that have ran under this auto payment when you click to change the details. This is especially helpful when you want to validate which invoices have been paid by auto-pay and which have not.
Frequently Asked Questions (FAQ)
I forgot my password, how do I reset it?
If you forgot your password or need to reset it, visit https://payments.ceojuice.com/Identity/Account/ForgotPassword?referer=sosfla. Alternatively, you can go to https://payments.ceojuice.com/sosfla, click Login and then use the Forgot your password? Button.
I have multiple email accounts, which one should I use to register?
Make sure you register with the email address we have on file for your accounts payable contact. The primary AP contact in our system will have access to view all invoices associated with your account and will be the primary admin user. If you are unsure or need to change what email we have on file, please email accounting@sosfla.com or call 407-830-7950.
Can I still pay via check or over the phone?
You can continue to pay by mailing a check to the address listed on the invoice. For security reasons, phone payments will no longer be accepted after 1/31/2026. If you need phone assistance with making a payment, our Accounts Receivable Specialist can walk you through making a one-time payment via the SmartPay website. Please call our office at 407-830-7950.
Will I still receive paper invoices or mailed statements?
You will continue to receive invoices and statements the same way as you did before, either via mail or email. If you would like to have your invoices and statements emailed SOS SmartPay Instructions (rev 2025.12.23)Page 13 of 14instead, please request this by sending an email to accounting@sosfla.com, providing your company name and/or account number along with the email to send them to.
Can I use a debit card or P-Card, or is it credit card only?
You can use any of these card types, however a debit card will not incur a processing fee. P-Cards, like credit cards, can be used and a processing fee will be assessed.
Are there any fees for paying online or using auto-pay with SmartPay?
A convenience fee will apply to all transaction types. Credit card payments will incur an additional processing fee. If multiple invoices are paid in a single transaction, only one convenience fee will be assessed. Payments made by check will not incur any fees.
Who is CEOJuice?
CEO Juice is the vendor that provides the integration to our ERP systems and facilitates the payment website on our behalf. As you utilize the system, the webpage URL will show https://payments.ceojuice.com/
Is this service secure?
Yes, payments are processed through NMI payment gateway services, meeting required security and PCI Compliances. All sites are properly secured and encrypted. For more information on NMI Security: https://www.nmi.com/developers/security/